Pricing Tiers; Quantity Breaks; Retained Earnings; Current Earnings
Company Maintenance - Defaults
System Location: Settings > System > Company Maintenance > Defaults
This area contains default values the system uses when creating records in certain areas of JobBOSS2 along with some behavioral settings that determine how the system will use provided values or create new records.
If you want to discard the changes you've made in Company Maintenance Defaults, be sure to use the Cancel button to return to the main Company Maintenance screen.
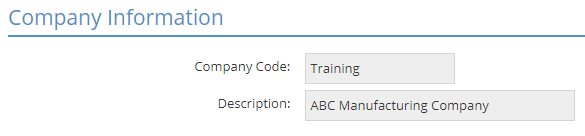
Company Information Section
This section displays the Company Code and matching Description the defaults will be used in.
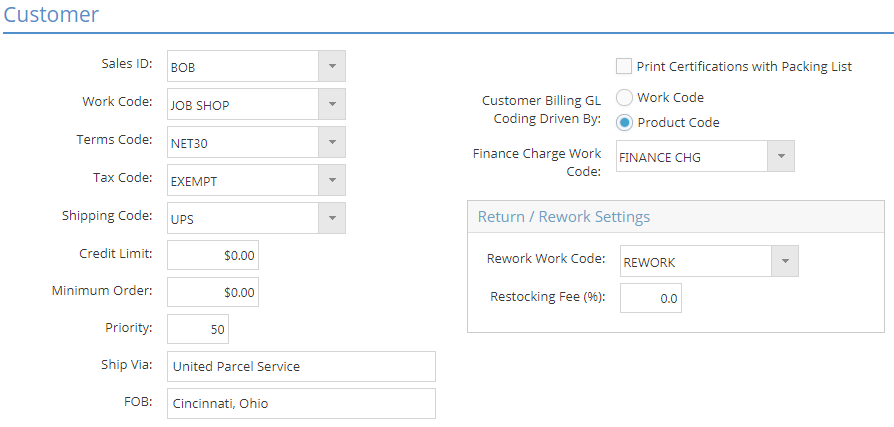
Customer Section
This section provides default values used on NEW Customer Codes in addition to settings related to providing information for customer billing.
New Record Defaults
Enter or select a value for any of the following fields for use on NEW Customer Codes:
- Sales ID
- Work Code
- Terms Code
- Tax Code
- Shipping Code
- Credit Limit
- Minimum Order
- Priority
- Ship Via
- FOB
Print Certifications with Packing List
Select this checkbox to have the system automatically place a check in the corresponding checkbox located in the Shipping Address Grid on new Customer Codes.
For more information see Customers.
Finance Charge Work Code
Use this dropdown menu to determine which Work Code the system should assign to any invoice created by the Finance Charge Billing Utility.
- The system looks to this Work Code for sales related information on finance charge invoices regardless the option selected to drive Customer Billing.
For more information see Finance Charges.
Return / Rework Settings Box
Rework Work Code
Use this dropdown menu to determine which Work Code the system should assign to new rework jobs.
- Rework jobs are created from Customer Returns or Internal Returns.
- The system creates Internal Returns as a result of reporting scrapped parts on data collection devices depending on how the associated Collection Terminal is configured.
Restocking Fee (%)
Enter the percentage value the system should use to determine the amount to charge customers that return parts that are not damaged or in need of rework.
- The appropriate amount is taken out of the credit invoice created for the returned parts.
When entering percentages in JobBOSS2, enter the value as a "standard" number instead of the decimal equivalent. For example, if the value should be five percent, simply enter "5" as opposed to ".05"; the system will automatically convert the value accordingly.
Behavioral Settings
Customer Billing GL Coding Driven By
This radio button determines how sales related G/L Codes are passed on to customer invoices from jobs.
- Work Code: Select this option have the system pull the designated G/L Codes from the Work Code assigned to the job.
- This option is useful to populate invoices based on to whom the items are sold.
- Product Code: Select this option have the system pull the designated G/L Codes from the Product Code assigned to the job.
- This option is useful to populate invoices based on what is being sold.
The system passes along the following G/L Codes from the option selected:
- *AR Account
- *Discount Account
- Sales Account
- *Freight Account
- Provide a freight "sales" account on the Work or Product Code to help differentiate between freight in and freight out.
*The system will populate these G/L Codes (on customer invoices) with values from the General Ledgers Section if a Work Code / Product Code is not present on the job.
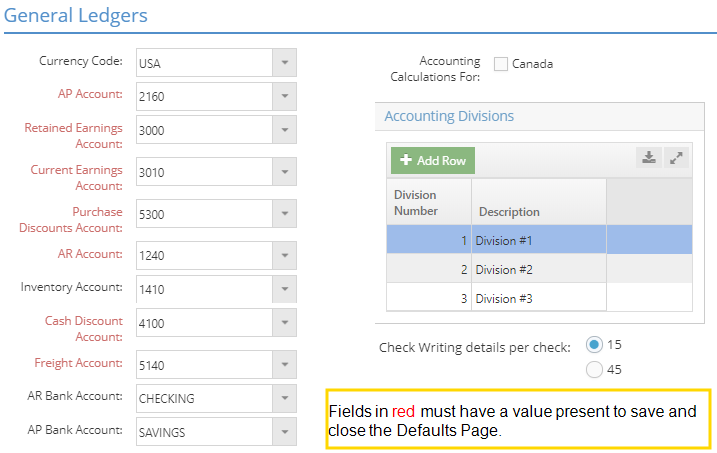
General Ledger Section
This section provides default values used on NEW accounting records in addition to settings related to divisional accounting and your native currency designation.
New Record Defaults
Select a value for the following fields for use on NEW accounting related records as indicated:
- Currency Code
- This value determines the "native" Currency Code for your company and is used and required on all accounting related records.
- The code selected should match the option selected for Accounting Calculations For (covered under Behavioral Settings that follow.)
- *AP Account
- This value is used and required on vendor invoices.
- *Retained Earnings Account
- This value determines which account Current Earnings are rolled into during year end processing.
- *Current Earnings Account
- This value determines which account is rolled into Retained Earnings during year end processing.
- *Purchase Discount Account
- This value is used and required on vendor invoices.
- *AR Account
- This value is used and required on customer invoices.
- The system uses the value present on associated Work or Product Codes to provide the default value first, then looks here if one is not available.
- This value is used and required on customer invoices.
- Inventory Account
- This value is used on inventory items.
- *Cash Discount Account
- This value is used and required on customer invoices.
- The system uses the value present on associated Work or Product Codes to provide the default value first, then looks here if one is not available.
- This value is used and required on customer invoices.
- *Freight Account
- This value is used and required on customer and vendor invoices.
- The system uses the value present on associated Work or Product Codes to provide the default value on customer invoices first, then looks here if one is not available.
- The system looks only here for the default value for vendor invoices, which is why this is typically set up with an expense related account to help differentiate between freight in and freight out.
- This value is used and required on customer and vendor invoices.
- AR Bank Account (Bank Code)
- This value is used and required on cash receipts.
- AP Bank Account (Bank Code)
- This value is used and required on checks (cash disbursements.)
Behavioral Settings
Accounting Calculations For
This check box determines how the system uses Tax Codes. If left blank, the system defaults to USA Tax Codes.
- USA (default): this option has the system provide a single Tax Code option on each production and accounting record where the field is present.
- The system assumes purchase orders and related vendor invoices are not taxed by default.
- Canada: this option has the system provide two Tax Code options on each production and accounting record where the field is present.
- The system assumes purchase orders and related vendor invoices are taxed by default.
- The system also provides a dropdown menu used to select the GST Code for use on invoices.
Accounting Divisions Box
Define Divisions here for use in printing divisional income statements.
- Division Number: The system uses this value to identify each Division.
- You can edit these values, but they must be unique.
- Description: Enter information in this field to identify what the Division represents.
- Common examples include product line options, geographic locations, or business units.
The system provides three Divisions by default, but you can add more as needed.
Division is a required value on G/L Codes, but is set to 0 (zero) by default which indicates the account is not associated with a specific division.
Check Writing Details
This feature allows you to select a maximum of either 15 or 45 invoices per check. It applies to both auto check writing and manual check writing.
If you select the option for a maximum of 45 invoices per check, the only data returned on the stub is the invoice number and net amount.
*The system requires a value be present in these fields in order to save the Company Defaults page.
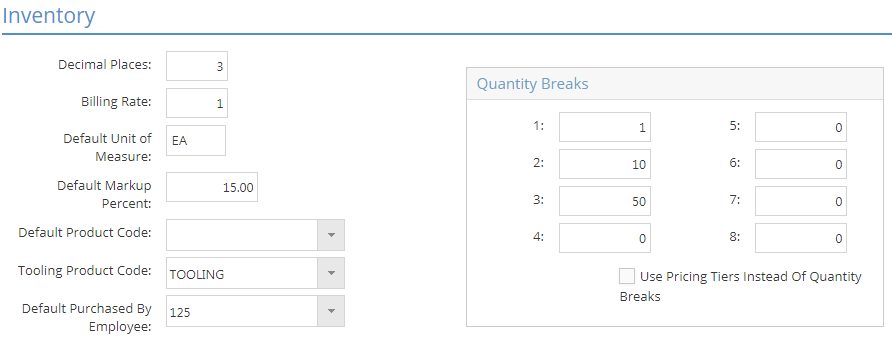
Inventory Section
This section provides default values used on NEW inventory related records in addition to settings related to displaying quantity breaks and dollar amounts for sales and cost values.
New Record Defaults
Select a value for the following fields for use on NEW inventory related records as indicated:
- *Billing Rate
- This value is used and required on estimates (manufactured parts.)
- The value entered must be a whole number between 1 and 10, inclusive.
- This value corresponds to the Billing Rate Descriptions entered in the Shipping Addresses Section of the Company Maintenance page and should represent a rate that has a description provided.
- *Default Unit of Measure
- This value is used and required on estimates and inventory items (purchased parts.)
- The value entered must be alpha characters and can be no more than 3 characters long.
- Default Product Code
- This value is used on estimates and inventory items.
- Default Purchased By Employee
- This value is used on purchase orders and vendor RFQs.
- Default Markup Percent
- This value is used on new parts added to JobBOSS2 from the Import BOM Utility.
- This value is NOT used on new parts created from within JobBOSS2 itself.
Quantity Breaks Box
The system uses the values entered here as the default quantity breaks on any new estimates created within JobBOSS2.
- These values are not used on the Purchasing Tab of inventory items.
- The system behaves differently if you choose to use Pricing Tiers (see information in Behavioral Settings that follow.)
Behavioral Settings
*Decimal Places
This setting determines the number of decimal places displayed in Unit Price and Unit Cost fields throughout the system. Examples of where this is seen include:
- Estimates
- Quotes (Unit Price only)
- Orders (Unit Price only)
- Inventory Items
- Purchase Orders (Unit Cost only)
- Customer Billing (Unit Price only)
- Vendor Invoices (Unit Cost only)
The value entered here must be a whole number between 2 and 5, inclusive.
- Values such as invoice totals and order totals always display out to 2 decimal places regardless of the value entered here.
Tooling Product Code
Select the Product Code to associate with tooling items that will be tracked for usage within the Quality Application.
- Create tooling items as Inventory Items and assign the Product Code selected here to distinguish them from material.
- These tooling items can then be used in Tooling Maintenance (under Quality) to track how often the items are used and when they are in need of servicing.
Quantity Breaks Box
Use Pricing Tiers Instead Of Quantity Breaks
Select this option if you would prefer to assign prices to customers based on assigned Pricing Tiers as opposed to quantity breaks.
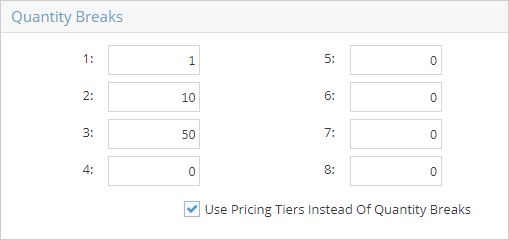
For more information see Using Pricing Tiers.
*The system requires a value be present in these fields that meet the criteria provided
Forms Section
Use the options in this section to print your company logo on selected forms.
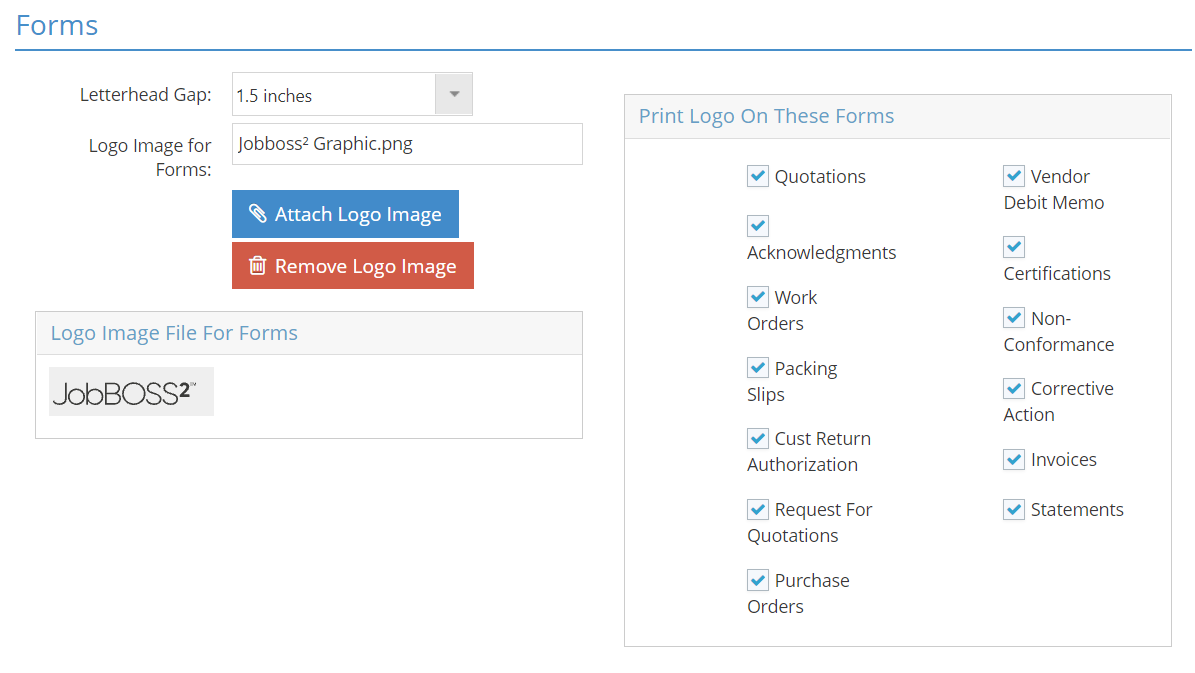
Letterhead Gap
Use this dropdown menu to set the margin between the logo image and the top of the form it appears on.
- The system provides values of 1.5 inches (9 lines), 2 inches (12 lines), and 2.5 inches (15 lines.)
Logo Image for Forms
This field identifies the logo file to print on the selected forms.
- Click the Attach Logo Image button to open the Repository Manager to select the desired image.
- The system displays the selected image in the Logo Image File For Forms box for preview purposes.
- The default Logo Image 1.5" wide and 1.5" in height.
- If the logo is larger than 1.5" in width or height, it will be automatically scaled down to fit that dimension.
- Click the Remove Logo Image button to clear the selected image.
For more information see Repository Manager, Documents, and Images.
Print Logo On These Forms Box
Use this area to determine which forms the selected logo should print on.
- Place a check next to each form the logo should print on.
- Leave the box blank to prevent the logo from printing.
Quoting Section
This section provides default values used on NEW quotes and estimates, including the Bar and Sheet Material Calculators.
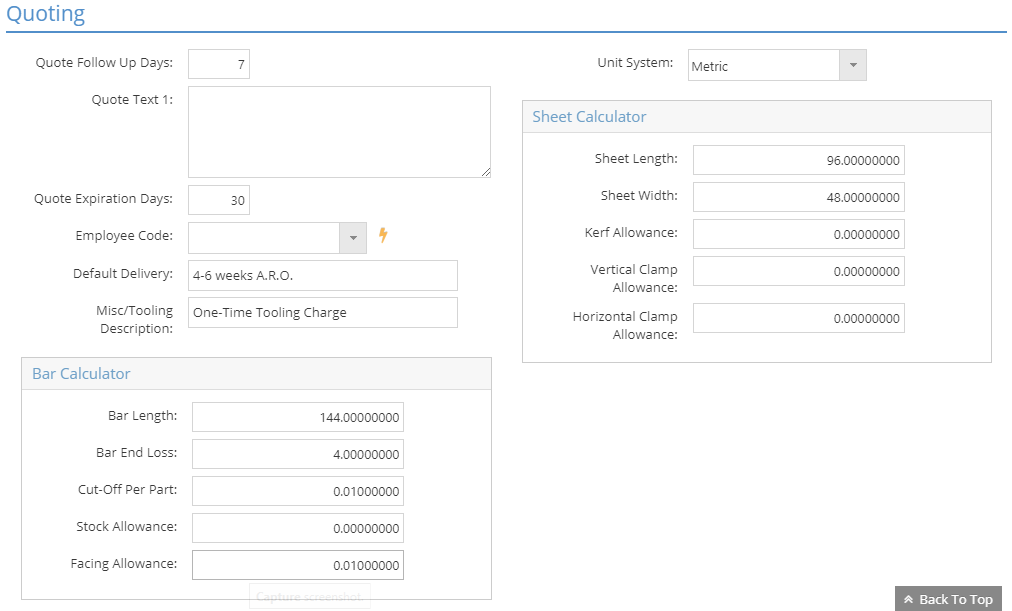
Quotes
The following values automatically populate on new quotes:
- Quote Follow Up Days
- Quote Text
- The system automatically passes Quote Text information on to orders where it populates the Notes To Customer field.
- Quote Expiration
- Employee Code
- Default Delivery
For more information see Quotations.
Estimates
These values are used on estimates.
Misc/Tooling Description
The system automatically populates new estimates with this value, which in turn populates the line item details of new quotes created for those parts.
- The system will also use this value on new quotes in situations where the user enters a freeform part instead of selecting a defined part.
Unit System
This dropdown allows you to select whether you would like your unit labels to display in the imperial system or the metric system.
- There are NO conversions performed by the system while switching between imperial and metric; it is simply a label change.
- Selecting imperial or metric does not affect any units manually entered by the user.
- For example, if you manually enter cm (centimeters) as a pricing or stocking unit of measure, switching to imperial does not change that label to inches.
- The only labels affected by this change are the ones for part weight and calculators.
Bar Calculator and Sheet Calculator Boxes
Enter dimension and use related values for the most commonly used bar and sheet material in the fields provided for use in the system provided Bar and Sheet Material Calculators.
- These calculators are available for use in the Bill Of Material section of estimates.
- Values entered here will appear in the Bar and Sheet Calculators whether they are on new or existing estimates.
- Value can be edited in the calculators as needed.
Interfaces and Documents Section
Use this section to indicate which (if any) interface you use for accounting or payroll purposes.
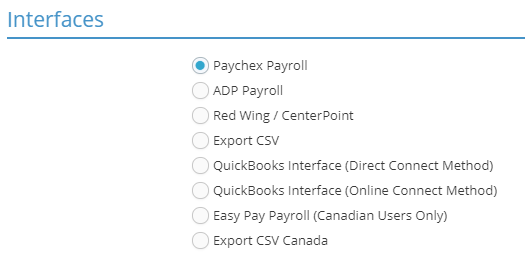
Payroll Service Providers
JobBOSS2 provides interfaces for the following payroll services:
These interfaces export information from JobBOSS2 that is sent to the appropriate payroll provider for processing.
Contact your payroll provider for information related to format requirements and charges.
Payroll Software Packages
JobBOSS2 provides interfaces for the following payroll packages:
- Red Wing / CenterPoint
- Easy Pay Payroll (Canadian Users Only)
- Sage 50 USA
- Use the Export CSV option for Sage 50 USA.
If you use the Export CSV option, all related invoices will be marked as PAID within JobBOSS2 upon exporting.
Accounting Integration
JobBOSS2 provides interfaces for the following accounting package:
- Sage 50 Canada
- Use the Export CSV Canada option for Sage 50 Canada
If you use the Export CSV option, all related invoices will be marked as PAID within JobBOSS2 upon exporting.
These interfaces export information from JobBOSS2 that is imported into the appropriate payroll package for processing. Depending on the options selected, information may be able to be imported back into JobBOSS2 for accounting purposes.
Australian Users Only
QuickBooks Interface (Direct Connect Method)
This interface provides the ability to export information from any of the following areas of JobBOSS2 to a QuickBooks company:
- Time and Attendance Tickets (Payroll)
- Payroll information can be imported back into JobBOSS2 if you are using the JobBOSS2 Accounting Application.
- A/R Invoices or Packing Lists (Customer Billing)
- A/P Invoices or Receivers (Vendor Billing)
For more information see Installing and Configuring the QB Desktop Sync Interface.
Install and Configure the QuickBooks (QB) Desktop Sync Interface
Use the QuickBooks® (QB) Sync Interface
Quick Books Online Sync Options
The QuickBooks (QB) Online Interface allows you to automatically synchronize information between JobBOSS2 and the selected QB Company for the purpose of creating AR and AP invoices in QuickBooks.
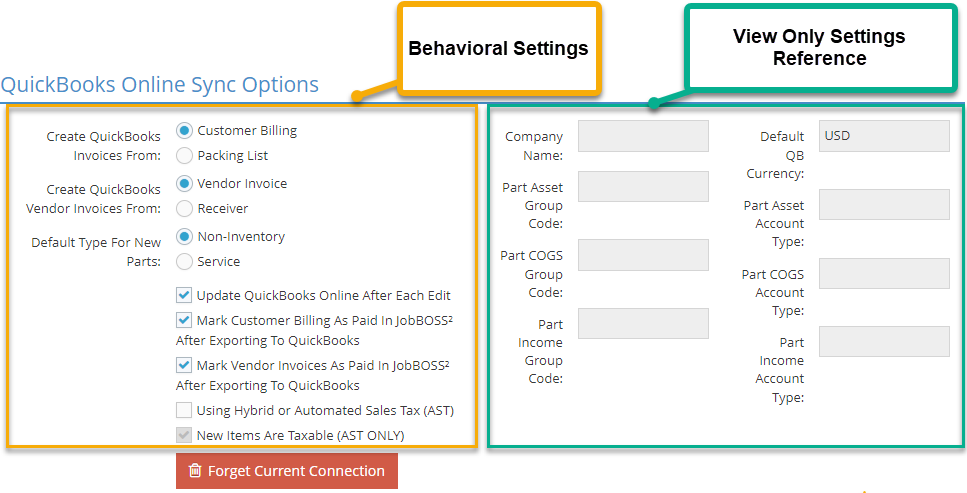
- This field will not appear unless you've selected QuickBooks Interface (Online Connect Method) in the Interfaces field.
For more information see Configuration and Features of the QB Online Interface.
Commerce Suite Integration
Commerce Suite is a accounts receivable (AR) and accounts payable (AP) automation platform that can integrated with JobBOSS2.
For more information, see Connecting to Commerce Suite.
Visit Syncing Vendors and Customers with Commerce Suite for additional information on integrating JobBOSS2 with Commerce Suite.
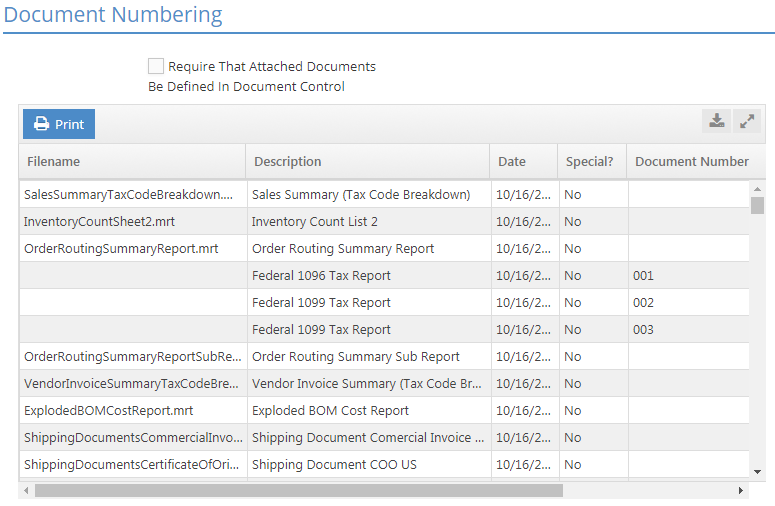
Document Numbering
This section provides the ability to add footer information to reports and is where document control is turned on or off for quality purposes.
Document Control
Require That Attached Documents Be Defined In Document Control
This setting determines whether documents must be included in Document Control before they can be attached to records in JobBOSS2.
- Place a check in the box to require a file be included in Document Control before it can be attached to a record in JobBOSS2.
- The Quality Application is required in order to have access to Document Control.
- Leave the box blank to allow users to attach any document included in the Repository Manager.
Report Footers
Use the grid in the Document Numbering section to add or edit footers to reports and forms throughout JobBOSS2.
Filename
This field provides the filename for each report.
Description
This field provides a description to help identify what each report covers.
Date
This is the current date.
Special?
This field indicates whether the report is "standard" report (No displayed) or a modified report (Yes displayed.)
Document Number
Enter the value to display at the bottom of the report in this field.
- This is the only field in the grid you can enter information in.
Net1 Payment
To set up and learn how to use Net1 for credit card payments, visit the How to Use NET1 for Credit Card Processing page.
Cloud Connections
For Cloud Storage Type, select one of the following:
-
Default - Uses the JobBOSS2 Repository for storage.
-
OneDrive - To setup and learn how to use OneDrive in JobBOSS2, visit the How to Use OneDrive with Repository Manager page.
Sign in with Microsoft button:
-
Click the Sign in with Microsoft button to initiate the authentication process:
-
Enter the required credentials in the Microsoft Sign in screen and then, click the Next button:

Once connected, the current user is displayed above the Disconnect from Microsoft button. Click the button to discontinue the connection. A validation window opens which asks the user to confirm the disconnection.

For Mobile Upload Location, select one of the following:
-
Default - This is the default setting where images and documents uploaded via te mobile app are saved to the JobBOSS2 repository.
-
OneDrive - Images and documents uploaded via the mobile app are saved to OneDrive.
Note: OneDrive is the default when it is selected as the Cloud Storage Type; this can be changed back to Default if desired.