Using Inspections in JobBOSS2
Use this guide to learn about using the Inspections function within JobBOSS2.
Enabling Inspections Display in Data Collection
To show the Inspections section in Data Collection, both of these settings must be enabled:
-
Collection Terminal Settings:
-
Go to Settings > Base Tables > Collections Terminals.
-
Select the applicable collection terminal and click the Edit button.
-
Under the General section, select Display Inspections Area and then click Save.
-
-
User Access: The touchscreen user ID must have access to orders. This is set under Company Maintenance.
Adding Inspections to Workflow Overview
Inspections can be added on Estimates in the Routing Details section.
-
If Inspections are added to an estimate, they are automatically pulled into the corresponding Order.
-
The Inspections area works the same way in both Estimates and Orders.
-
Users can have a base set of Inspections on the estimate and then edit or add inspections specifically for each order.
How to Add Inspection Information

There are three options for adding inspection rows in both Estimates and Orders:
-
Manually: Click the Add Row button and enter in the desired information.
-
Copy a Row: Click on a row to select it and then click the Copy button.
-
Import CSV: Click on the Import button to upload a .CSV file with inspection data. Note: When importing Inspections, the file must follow a specific column structure:
Column Field A Inspection Type B Label C Decription D Field Type E Frequency F Units G Minimum H Maximum I Count J Measured K Comments
-
Row 1: Header (this row is ignored by the system).
-
Row 2: First inspection line.
-
Row 3: Second inspection line, etc.
Important Fields and Calculations
-
The Pass/Fail field is only available and calculated in Orders (not in Estimates).
-
The Minimum, Maximum, and Measured fields must be numeric for the Pass/Fail calculation to work correctly.
-
The Pass/Fail logic:
-
If the measured value is between the minimum and maximum, the inspection passes.
-
If the measured value is outside this range, it fails.
-
Printing Inspection Reports
-
When using the Job Traveler, there is an option to Automatically Print the Inspections Report.
-
This option is found under Include These Reports in the Job Traveler settings.
Using Inspections in Data Collection
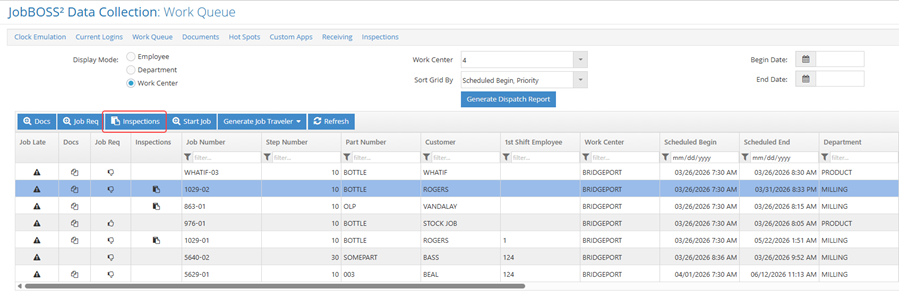
Jobs with inspection information show an Inspections flag in the work queue. Selecting a job with this flag will show an Inspections button. Clicking this button takes you to the Inspections tab in data collection.
In Data Collection, users can only enter:
-
Measured Values
-
Comments
-
Count
Entering Information in Data Collection
To record inspection data in data in the field:
-
Navigate to the Inspections tab in Data Collection.
-
Use the Navigator to search for the desired job.
-
Once found, either double-click the job or highlight it and click the Edit button.
-
The system will display the routing steps. Select the specific Routing Step to work on.
-
Click the Details button to open the entry screen.
-
Data Entry Limits: In Data Collection, users can only enter information for Measured, Comments, and Count. All other fields and the ability to add new rows must be handled in the main application.