Hot Spots
Hot Spots are SQL statements that can be assigned to individual users for the purpose of displaying information from JobBOSS2 on demand. Depending on who is logged in and how users are configured, Hot Spots can be accessed in the following ways:
- Hot Spots assigned to the User that is currently logged in can be accessed at any time by clicking the 'Hot Spots' button located in the Quick Access Toolbar.
- Users with security rights to User Maintenance can also add and edit Hot Spots to their own account from here.
- Hot Spots assigned to any User can be accessed from User Maintenance by Users with sufficient security rights.
- This is where Hot Spots are assigned to Users.
- Hot Spots assigned to the 'Touch Screen User ID' (located in Company Maintenance) can be accessed from the Data Collection application.

For more information see Access and Use Hot Spots.
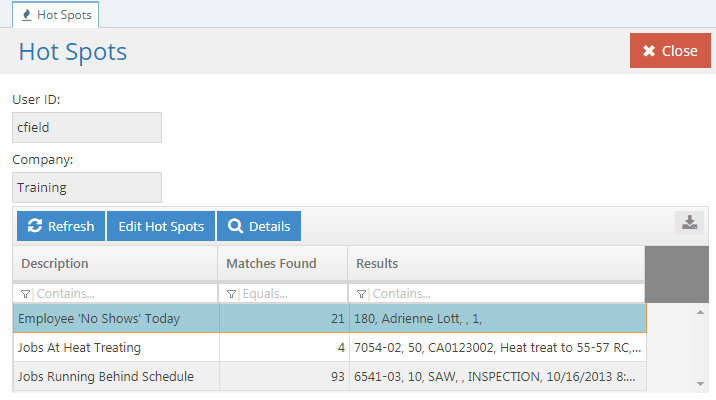
This screen displays the results of Hot Spots that are assigned to the listed User. Regardless of where they are accessed, the options and information available are the same; the only thing that will differ is the ability to edit Hot Spots.
This screen only displays Hot Spots that have results to return or that require some sort of user interaction, meaning that it may not display ALL Hot Spots actually assigned to the listed User. To see a complete list of Hot Spots assigned to a User, edit the User ID in User Maintenance.
User ID
This field identifies the User the listed Hot Spots are assigned to.
Company
This field identifies which company the User (and their assigned Hot Spots) is associated with.
Action Buttons
Refresh
Clicking this button refreshes the list of Hot Spots available to the listed User.
- The grid updates with regards to the Hot Spots listed (new ones assigned to the User appear, existing ones removed from the User disappear, etc.)
- The results of assigned Hot Spots are updated and displayed as appropriate.
Edit Hot Spots
Clicking this button opens the 'Hot Spot Maintenance' screen which is where existing Hot Spots can be edited, new Hot Spots created, and existing Hot Spots assigned to the listed User.
- This button is only available to Users with security rights to User Maintenance.
Details
Clicking this button provides the details associated with the number of 'Matches Found' for the selected Hot Spot.
- For Hot Spots that require some sort of input, clicking this button provides the necessary prompt(s).
Grid Details
Description
This displays information regarding the kind of information the Hot Spot is designed to provide.
Matches Found
This represents the number of records that match the criteria included in the Hot Spot.
- The only time this value will display 0 (zero) is when a Hot Spot is present that requires user input.
Results
This field displays the results of the first record that matches the criteria included in the Hot Spot.
- This provides an example of the kind of information that will be displayed for each record that matches the Hot Spot.
- To see a complete list of results, select the Hot Spot and click the 'Details' button.
No values or captions can be edited on this screen.
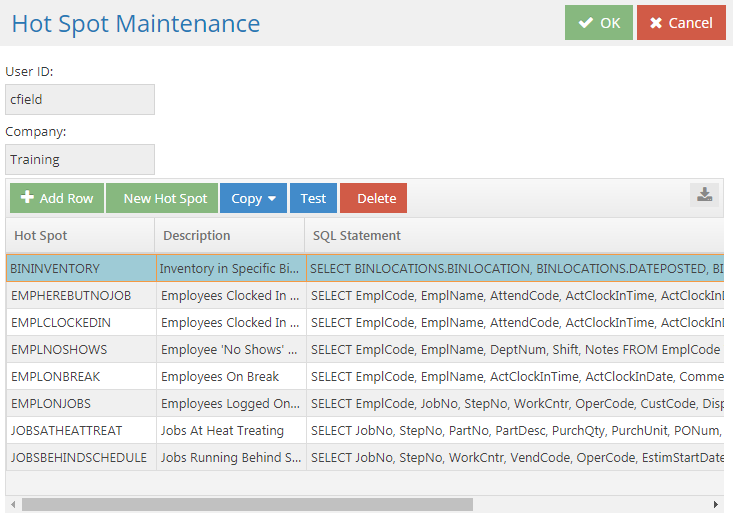
This is where Hot Spots are created, edited, and assigned to Users.
- Hot Spot Maintenance can only be accessed by Users with security rights to User Maintenance.
- This screen displays all the Hot Spots assigned to the listed User.
- Hot Spot Maintenance cannot be accessed from the Data Collection application regardless of the User assigned as the 'Touch Screen User ID.'
User ID
This field identifies the User the listed Hot Spots are assigned to.
Company
This field identifies which company the User (and their assigned Hot Spots) is associated with.
Action Buttons
Add Row
This button is used to add a row to the Hot Spot grid for the purpose of manually entering a Hot Spot, including the required SQL statement .
New Hot Spot
Clicking this button opens the Query Wizard that can be used to guide the User through the process of creating a new Hot Spot, including the required SQL statement.
Copy
This button is used to copy an existing Hot Spot from one User to another.
- The presence of a 'DEFAULT' User ID allows for System Default Hot Spots to be copied to the selected User.
Test
This button is used to test the validity of the selected Hot Spot.
- If the Hot Spot did not run successfully, a message is displayed indicating the nature of the problem with the SQL statement provided.
- If it does run successfully, the message displays whether there were any records to return or not.
Delete
This button is used to remove a Hot Spot from the selected User.
- This does not delete the Hot Spot from the system so long as it is assigned to at least one other User.
For more information see Create Hot Spots.For more information see Assign Hot Spots.
Grid Details
Any of the values located in the grid can be edited, however the changes will only affect the Hot Spots for the listed User.
Hot Spot
This identifies each Hot Spot in the grid.
Description
This displays information regarding the kind of information the Hot Spot is designed to provide.
SQL Statement
This is the SQL statement that determines what information will be returned by the Hot Spot.
- SQL statements can be created by entering the information manually or by using the Query Wizard.
- Using the Query Wizard overwrites any information already present in this field.


 Hot Spots Screen - User Access