Miscellaneous Utilities
Using the 1096 / 1099 Forms Utility
System Location: System > Miscellaneous Utilities > 1096/1099 Forms
This document explains the purpose and steps of this application JobBOSS2 SHOP. There is a breakdown of the concept and functionality as well as specific instructions for using the application.
The 1099 form has been updated to be in compliance with the latest changes. The user will not see any change while generating the form.
About the 1096/1099 Forms Utility
This topic demonstrates how you create 1096/1099 Forms for your vendors using JobBOSS2. This utility filters through the system to find all of the information associated with vendors selected as 1096/1099 recipients, and then it creates a form for you to send to the vendor during tax season.

The Form 1099 Vendor? field is found under Credit section of a Vendor Code.
Running the 1096/1099 Forms Utility
- On the 1096/1099 Forms page, generate a form(s).
- 1096 Form
- Place a check by the box Print Form 1096.
- Select an Unattended Operation.
- A Pre-Addressed Form will not print the 1096 with your address included.
- A Not Pre-Addressed Form will print the 1096 with your address included.
- Approve or adjust the contact information as necessary.

- 1099 Form
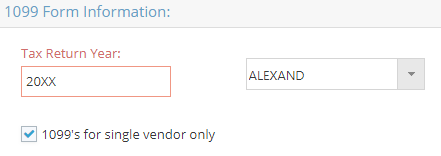
- Fill in the Tax Return Year field.
- Decide if you wish to print 1099's individually or all at once.
- Place a check in the box 1099's for single vendor only if you wish to print 1099's individually.
- Select the Vendor Code for the 1099 you wish to print in the dropdown field.
- Only vendors set to receive a 1099 form will appear in the dropdown.
- Select the Vendor Code for the 1099 you wish to print in the dropdown field.
- Do not place a check in the box 1099's for single vendor only in order to print a 1099 form for all eligible vendors.
- Place a check in the box 1099's for single vendor only if you wish to print 1099's individually.
- 1096 Form
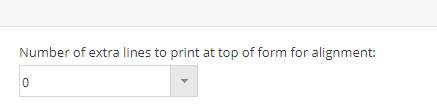
- To align your 1096/1099 form properly for printing, adjust the Number of extra lines to print at top of form for alignment field as needed.
- Click Generate Report.