Payroll Interface; 1057; QB Connector; QB Sync; Synchronize;
How to Fix a 1057 Error when Installing QuickBooks
What is a 1057 Error?
During the QuickBooks interface installation process, the installer automatically creates a Microsoft Windows user. Sometimes, the customer's network has strict password requirements, and the password automatically generated with the Microsoft Windows user does not meet the requirements. In the event that this occurs behind the scenes while the QB Sync install is processing, a 1057 Error will appear.
How to Fix a 1057 Error - Creating a New Microsoft Windows User and Password
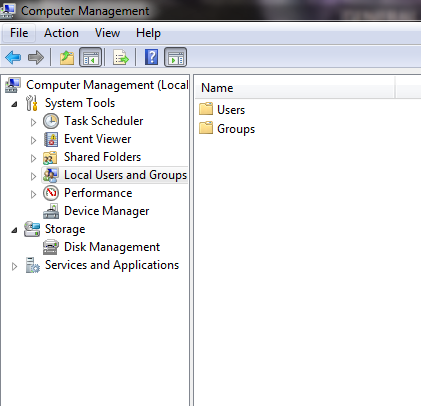
- On your computer, go to Computer Management.
- Select Local Users and Groups.
- Right click on the Users folder and select New User.
- Create a User name, Password, and un-check User must change password at next logon. Note, E2QBSYNC is an example user for this process.
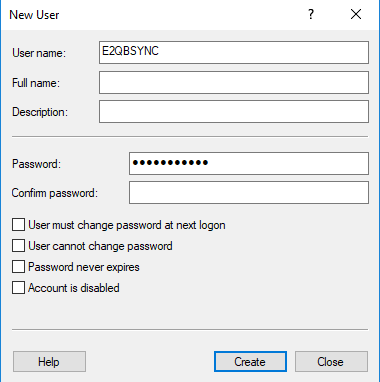
- Click Create.
- Double click on the user you just created.
- Select the Member of tab.
- Click Add.
- Fill the From this location: line with the name of the computer you are currently using.
- Fill the Enter the object names to select field with the name of the computer, a backslash, and the word Administrators.
- The example below uses KHARDMAN_W7 as the computer name.
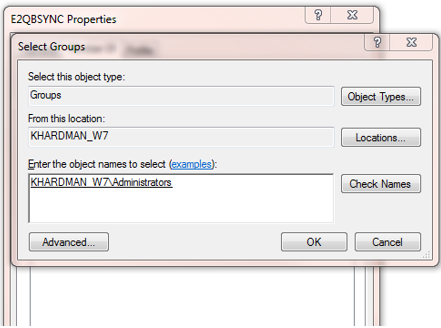
- Click OK to save the group.
- Click OK again to save out of the Microsoft Windows users you just created.
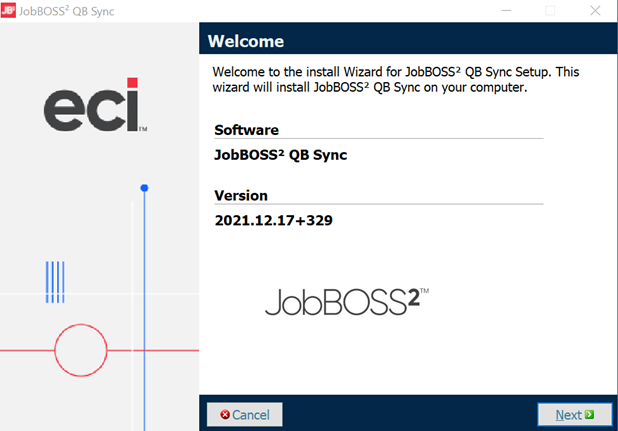
Now you must reinstall the QB Sync
- Go to the purple Help button, open the Client Downloads dropdown menu, and select Quickbooks Sync.
- Run the JobBOSS2 QB Sync.exe file downloaded by the system.
- Files are saved in the Downloads directory by default.
- Answer Yes to the prompt to allow the program to make changes (if one is provided).
- Click Next on the Welcome screen of the installer to continue.
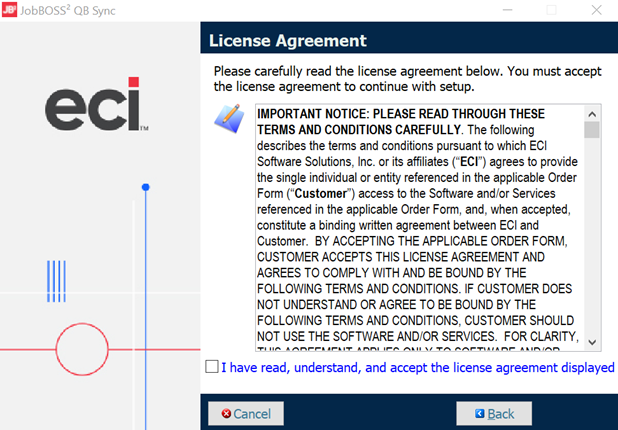
- Click the check box to indicate acceptance of the license agreement.
- Click Next to continue.
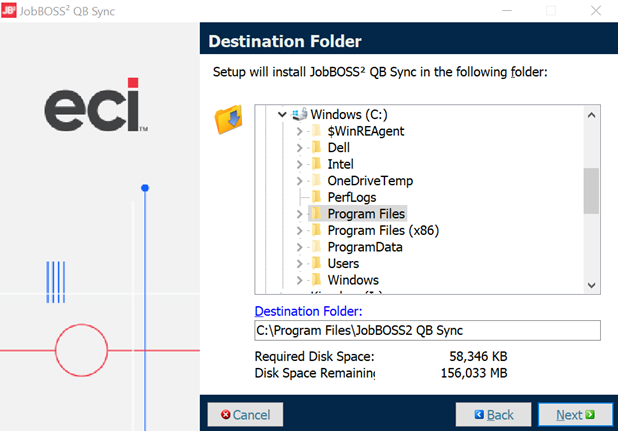
- Verify the destination folder for the installer file and click Next to continue.
- Select a different folder before continuing to save to another location.
- Enter the name of the server where JobBOSS2 is running.
- This can easily be populated by copying the url from the browser window running JobBOSS2 and pasting it into the installer window.
- When pasting the path, remove any extensions at the end, such as 'Dashboard', 'Navigator', etc.
- Click the check box to use an existing User ID (the one you just created within Computer Management) for the purpose of accessing the QB Sync Windows Service.
- Additional fields will appear once you check the box.
- Service Username- Enter the computer name, a backslash, and the username you created.
- In our example above, this would be KHARDMAN_W7\E2QBSYNC
- Service Password- Enter the password you created with your Microsoft Windows user.
- Service Username- Enter the computer name, a backslash, and the username you created.
- Additional fields will appear once you check the box.
-
Click Next to continue.
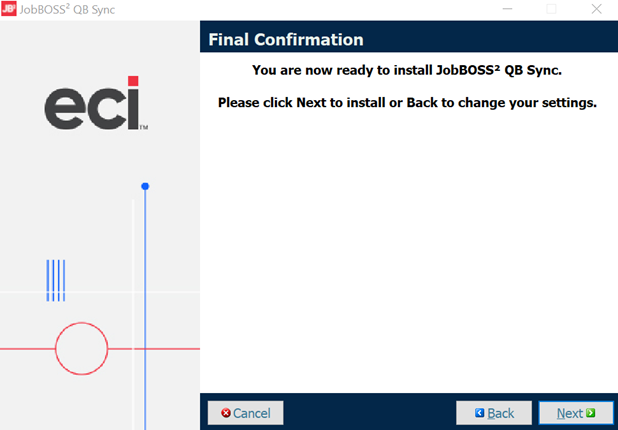
- Click Next on the Final Confirmation page.
- The installer indicates the QB Sync is being installed and provides a progress indicator.
- Click Finish to close the installer.

Finally, you must grant rights to your user to complete the connection.
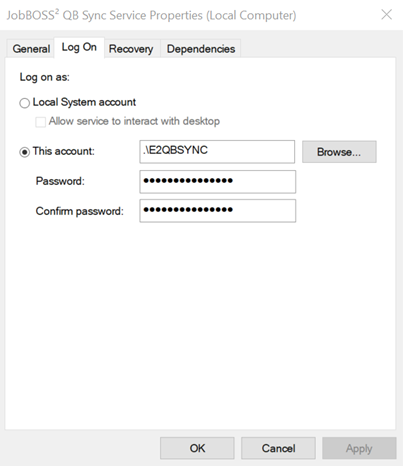
- Go to Services on your computer.
- Right click on JobBOSS2 QB Sync Services and select Properties.
- Open the Log On tab.
- Replace the characters in the Password / Confirm Password fields with the password you created for your Microsoft Windows user and click Apply.
You have successfully corrected the 1057 error. Resume Install and Configure the QuickBooks (QB) Desktop Sync Interface instructions at step 15.