QB Sync; Synchronize;
Using the QuickBooks® (QB) Online Interface For The First Time
Select QB Online Interface
- In the Navigation Sidebar, click the Settings button.

- Open the System drop down menu.
- Select Company Maintenance.
- Click Edit and then click Defaults.
- Navigate to the Interfaces Section.
- Select the QuickBooks Interface (Online Connect Method) radio button.
- Select the desired options in the QuickBooks Online Sync Options Section that appears after selecting the Online Interface.
For more information see Configuration and Features of the QB Online Interface.
- Click OK to exit Defaults.
- Click Save to exit Company Maintenance.
- Settings are not saved until you completely exit Company Maintenance.
Open QuickBooks Company
- Open QuickBooks and log in to the company you want to sync with.
Enable Deposits (in QB Online)
- Select the Deposit option in your QuickBooks company is selected.
- As of October 2019, this setting was located in Company Settings > Sales > Sales Form Content; however this location is subject to change by Intuit. Please refer to QuickBooks documentation if you need assistance in locating this setting.
Edit Currency Codes
- Open the Base Tables drop down menu (located under the Settings option in the Navigation Sidebar).
- Select Currency Codes.
- Edit a Currency Code from the grid.
- Open the Quickbooks Currency Code dropdown menu in the General section.
- Select the Quickbooks Currency Code that corresponds with the Currency Code you are editing in JobBOSS2.
- Click Save and repeat these steps for all Currency Codes.
Edit GL Group Codes
- Open the Base Tables drop down menu in JobBOSS2 (also located under the Settings option in the Navigation Sidebar.)
- Select GL Group Codes.
- Click New to create a new code. In total, create the following 2 new group codes:
- Accounts Receivable - Must be associated with Quickbooks Account Type 1
- Accounts Payable - Must be associated with Quickbooks Account Type 2
- Edit remaining Group Codes and assign the appropriate Quickbooks Account Types.
- Quickbooks Account Type is a field added to Group Codes once the QB Online Interface option is selected in Company Maintenance.
For more information see Configuration and Features of the QB Online Interface.
- Quickbooks Account Type is a field added to Group Codes once the QB Online Interface option is selected in Company Maintenance.
Edit GL Codes
- Open the Tables drop down menu in JobBOSS2 under the Settings option in the Navigation Sidebar.
- Select GL Codes.
- Select the GL Code for Accounts Receivable and click Edit.
- Change the GL Group Code from its current value to the newly created Group Code assigned to the Accounts Receivable Quickbooks Account Type .
- Click OK.
- The Quick Books Online Setup screen displays.
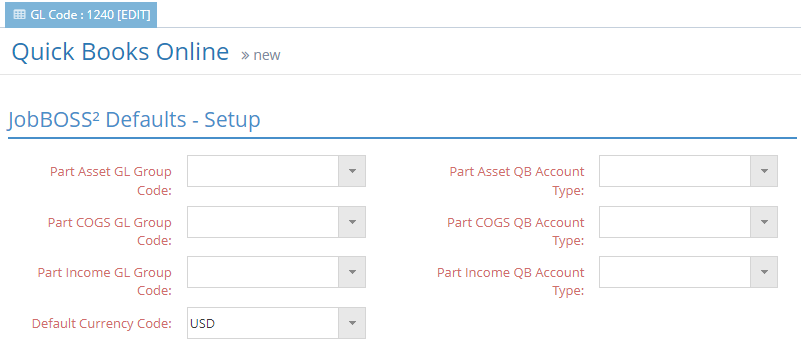
- The Quick Books Online Setup screen displays.
- Select the Group Code to associate with the “generic” JobBOSS2 accounts the interface will create in the QuickBooks chart of accounts.
- The related QB Account Type field will automatically populate so long as you have edited the Group Codes. If not, select the QB Account Types as needed.
- Click OK.
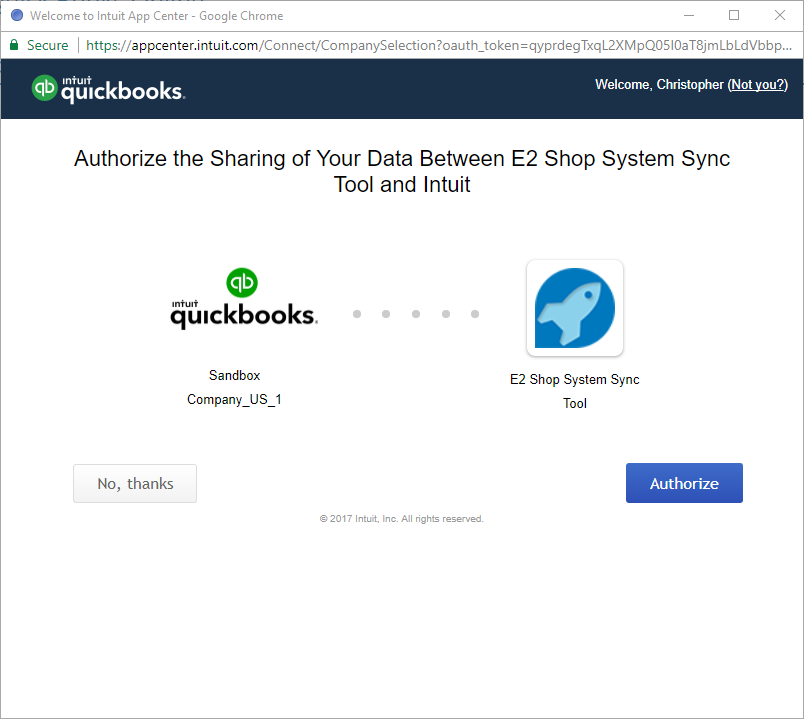
- Click the Connect To QuickBooks button that displays.

- Click Authorize to allow your QB Company to communicate with JobBOSS2.
- Click OK (again) to complete the change to the AR GL Code.
- Select the AP GL Code and click Edit.
- Change the GL Group Code to the newly created Group Code assigned to the Accounts Payable Quickbooks Account Type .
- Click OK.