This topic provides details on how to create an order for customer releases from a quote, covers the basics of editing information on a job, and shows how to process an order.
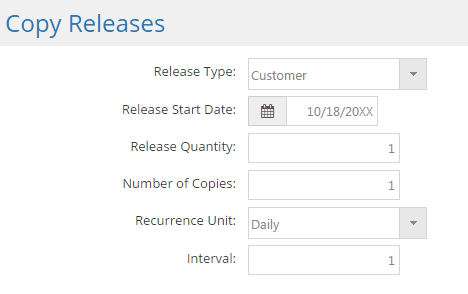
Clicking the Calculate Releases button launches a utility that can be used to create multiple releases at one time by populating the following fields and clicking OK.
Release Type
This option Indicates the destination for the associated quantity of the part.
Customer - Items will be shipped to customer
Stock - Items will be placed into inventory
Release Start Date
This determines the shipping date of the first release created.
Release Quantity
This represents the number of parts that are expected to be shipped for each release created.
Assumes the same quantity will be shipped each time, but the values can be edited afterward
Number of Copies
This determines how many releases will be created by the utility.
Recurrence Unit
This setting works in conjunction with the selected Interval (immediately below) to determine how frequently the items will be shipped. Options include:
Daily
Weekly
Monthly
Quarterly
Yearly
Interval
This value determines how far apart items will be shipped in terms of the Recurrence Unit selected. For example, a Recurrence Unit of "Weekly" with an Interval of "3" would create releases three weeks apart.
Releases can be entered and edited individually as well
If more parts will be made than the customer ordered, the additional units can be entered as a Stock Release and placed into inventory when completed.
When line items are added to an order, clicking the Process button calculates job requirements for each one and makes them available for production within JobBOSS2.
For additional details on processing and unprocessing an order, see
Order Processing.
For more detailed step by step instructions on processing, see Process the Order.
Production related work cannot begin on a line item in JobBOSS2 until it has been processed and received a Job Number.
The following scenario assumes the Automatically Post Material option is selected in Company Maintenance.
Click Process.
Determine whether parts can / should be posted from inventory. (Displayed under the Quantity Section)
Determine whether parts can / should be re-directed (also referred to as being "robbed") from an existing stock run. (Displayed under the Quantity Section)
Determine whether material requirements can / should be posted from inventory. (Displayed under the Material Section)
Determine whether to review posting assumptions for any additional jobs that will be processed or not.
Job processing will continue if there are additional line items on the order that have not been reviewed or if there is a need to create a subassembly job as a result of the material calculations in step 4.
The user has two options on how to proceed with processing: OK or OK All (buttons located at the top of the screen).
Clicking OK closes the Line Item Quantity Specification screen for the current part listed on the order and displays the same options for the next part (if there is one.)
The user will have the ability to make the same decisions as listed above and would go through the same steps for each part so long as they click OK and there are more line items to process.
Clicking OK All closes the Line Item Quantity Specification screen for the current part listed on the order and automatically decides how material will be posted for any remaining items.
The user will not have the ability to decide whether material should be posted or not or to edit where it comes from for any remaining line items.
Once all line items have been dealt with the system closes the order form and displays the Order Navigator screen.
Once started, job processing cannot be canceled or stopped.
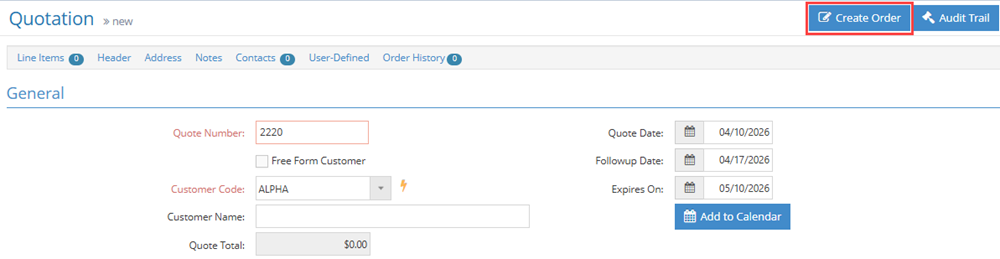
Select the quote from the Quote column and then click the New button.
In the General section, select the applicable Customer Code.
In the Line Items section, click the Add Row button and select the applicable Part Number.
Click the Create Order button.
The Select Quote - Line Item Selection screen opens. Click OK.
The Order screen opens. Click the Process button.
The Line Item Quantity Specification screen opens. Click OK. The Order Navigator screen opens.
On the Order Navigator screen, select the order in the Order column and then click the Edit button. The dashboard for the order opens.
Click the Create Shipment button.
The Order Selection - Line Item screen opens.
Review information and click OK. The Packing List screen opens.
Review the information, then Click Process.
The Order Navigator screen reopens. The Shipment is processed for the applicable Order line items. If all items were shipped, then the order will show as Closed.