Service Logs; JobBOSS2 Service
Queued Reports
The ability to queue a report for generation at a future time is available as an option on any report or summary throughout JobBOSS2. Queued reports are sent to the designated individual(s) as a PDF attachment to an Email.
Queued Reports require JobBOSS2 to be running in order to generate as expected.
For more information see Service Logs and the JobBOSS2 Service.
To queue a report, open it and select the 'Queue' option located in the Generate Report dropdown menu.
Queued Reports use the same filters and options selected every time it is generated, a fact that should be taken into consideration if date ranges are used.
Each Queued Report type is saved to a singular user ID. Creating a new report of the same type overrides the previous report and saves to that user ID. If you need to save more than one queued report of the same type, save each one to a different user ID.
An asterisk [*] indicates a required field.
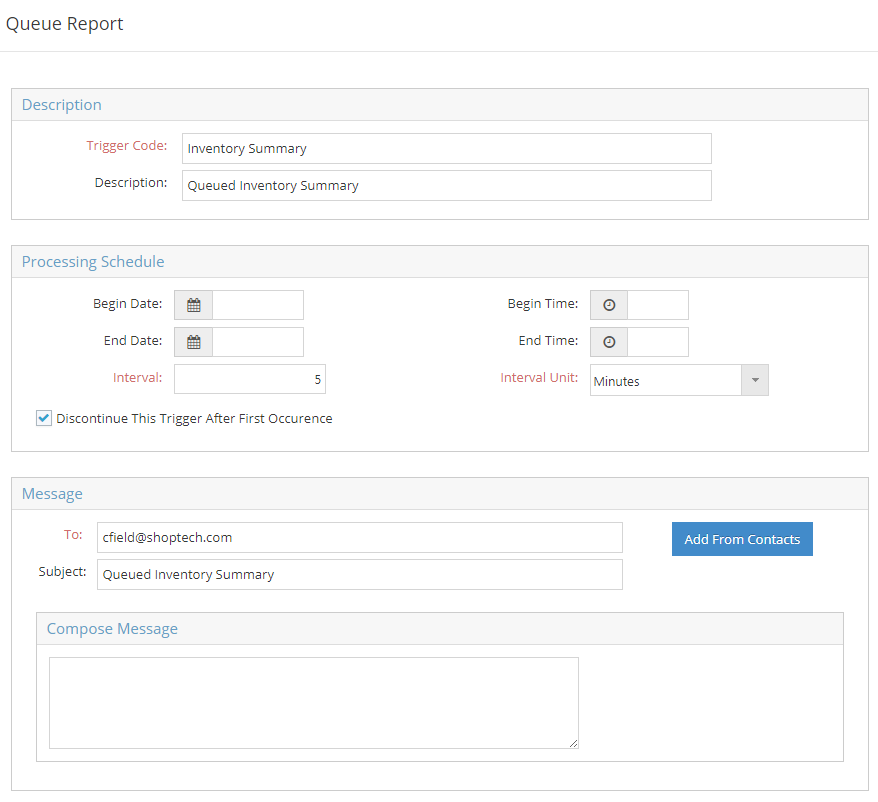
*Trigger Code
This field is required and is used to identify the Queued Report.
- The field is automatically populated based on the report being queued, but can be edited during creation.
Description
This field can be used to provide additional information about the report being queued.
- The field is automatically populated based on the report being queued, but can be edited at any time.
Begin Date
This represents the date the JobBOSS2 Service will start processing the Queued Report Trigger.
End Date
This represents the date the JobBOSS2 Service will stop processing the Queued Report Trigger.
- If left blank, the Service will look for the report indefinitely unless the Trigger is deleted or unless the option to 'Discontinue ... After First Occurrence' is selected.
Begin Time
This represents the specific time of day the JobBOSS2 Service will start processing the Queued Report Trigger.
- This occurs for the first time on the date selected as the 'Begin Date.'
- This time may have to be reset during Daylight Savings.
End Time
This represents the specific time of day the JobBOSS2 Service will stop processing the Queued Report Trigger.
- If left blank, the Service will look for the report indefinitely unless the Trigger is deleted or unless the option to 'Discontinue ... After First Occurrence' is selected.
*Interval
This value determines how frequently, in terms of the 'Interval Unit' selected, the JobBOSS2 Service will generate the report.
*Interval Unit
This value determines how long the JobBOSS2 Service will wait before generating the report.
The Service will generate the report for the first time on the 'Begin Date' after the specified 'Interval' (in terms of 'Interval Unit') has passed after the selected 'Begin Time.'
- The report will continue to generate at the stated interval until the stated 'End Time' / 'End Date' if they are present.
-
Discontinue This Trigger After First Occurrence
When this option is selected, the Trigger will be removed from the JobBOSS2 Service once the listed "Begin" and "Interval" values have been reached for the first time.
- If the report does not generate for some reason, the Service does not attempt to generate it again; it simply discontinues the Trigger as configured.
*To
This is the Email address of the person (or people) that will receive the report once it is generated.
- Email addresses are separated by a comma if more than one is present.
- Email addresses can be entered manually or selected from the system by clicking the 'Add From Contacts' button (covered below.)
Subject
This value will be used as the subject line of the Email.
- By default the subject will refer to the report name being sent, but can be edited.
Add From Contacts
Clicking this button opens the Add From Contacts grid that can be used to select one or more Email Addresses to add to the 'To' field.
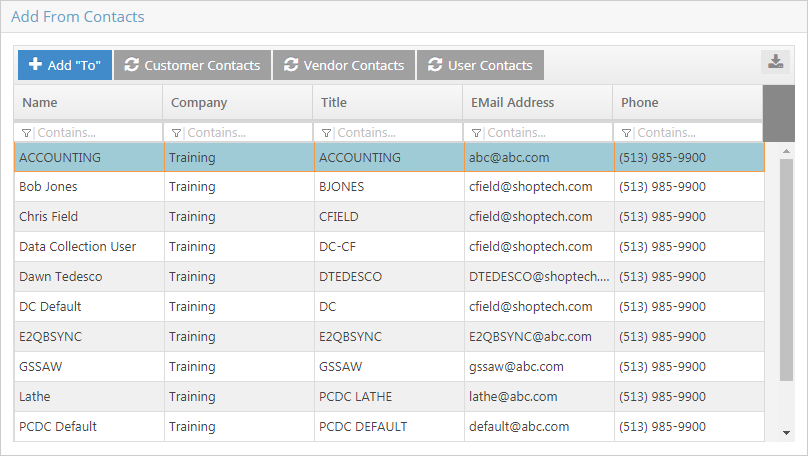
- Select the type of contact to add by clicking the appropriate tab: Customer Contacts, Vendor Contacts, or User JobBOSS2 Contacts.
- Select one or more contacts in the grid and click 'Add "To"' to place the Email address(es) in the 'To' field.
- Email addresses must be associated with a Customer, Vendor, or JobBOSS2 User in order to be available in any of these grids.
Compose Message
This field is used to enter information that will be used as the body of the Email being sent.
- When the 'Add From Contacts' button is clicked, it is replaced with the 'Compose Message' button that is used to close the contacts grids.
- The 'Compose Message' field can be expanded by clicking the lower right corner and dragging it to the right and / or down.