This removes the customer and all past due invoices associated with the customer (that were displayed in the Past Due Invoice List Grid) from the utility at the same time.
To remove specific past due invoices:
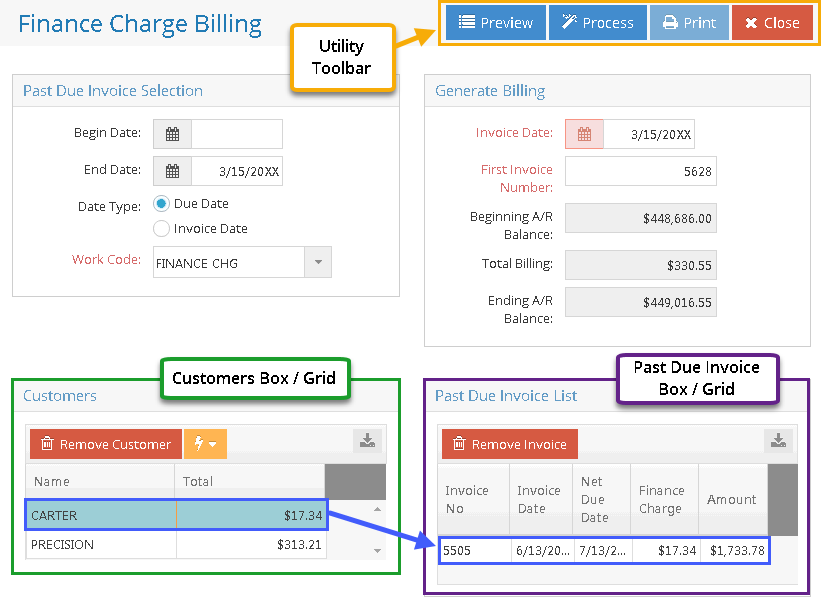
Select a customer in the Customers Grid.
Select the associated past due invoice(s) to remove in the Past Due Invoice List Grid.
Click Remove Invoice (located above Past Due Invoice List Grid.)
This removes the specified invoice(s) from the utility but leaves the remaining invoices associated with the customer.
Once the list of past due invoices has been finalized, the user can create the finance charge invoices.
Generate Billing Box
Select the Invoice Date that will be used on any finance charge invoices created.
This defaults to the current date but can be edited
Determine the First Invoice Number that will be assigned.
Uses value provided in Next Number portion of Company Maintenance by default, but can be changed.
The value will be increased by an increment of 1 for each additional invoice created.
Each Invoice Number generated must be unique.
Click Process.
The utility prompts whether the user wishes to continue with the invoice creation process.
Click Yes on the prompt.
The displayed Customers and related Past Due Invoices are removed from the utility.
Clicking 'No' returns the user to the utility without creating any invoices.
(OPTIONAL) Print the invoices just created.
Click Print Invoices.
This option is not available until the utility has been processed.
In the invoice print spool, select the invoices to print and generate them accordingly.
It is suggested to clear the print spool prior to processing if the invoices will be printed immediately after creation to avoid accidentally re-printing invoices that may have been edited previously.
Once generated, click Close.
The user is taken back to the Finance Charge Billing Utility.
Click Close to exit the utility.
Invoices will continue to display in the utility so long as they remain past due and fall within the required criteria, even if a past due invoice has already been created for it.