User Maintenance - Security Settings
System Location: Settings > System > User Maintenance > Security
Use this area to set the level of security for the selected User.
Areas Covered
Security settings are broken out into sections labeled General, Shop Floor Control, and Accounting.
General Section
The General Section includes the following areas, each of which has additional sub-topics (not listed here.)
- Company Maintenance
- System Maintenance
- Table Maintenance
Anyone with access to User Maintenance (located under System Maintenance) has access to these settings.
Shop Floor Control Section
The Shop Floor Control Section includes the following areas, each of which has additional sub-topics (not listed here.)
- Quoting
- Order Processing
- Inventory
- Purchasing
- Shop Control
- Cost Analysis
- Quality
Accounting Section
The Accounting Section includes the following areas, each of which has additional sub-topics (not listed here.)
- Accounts Receivable
- Accounts Payable
- General Ledger
Selecting Available Options
Use the checkboxes provided to determine the level of access available to your users.
- Place a check next to each area or specific record the user should be able to access.
- Items left blank will not display when the user logs in.
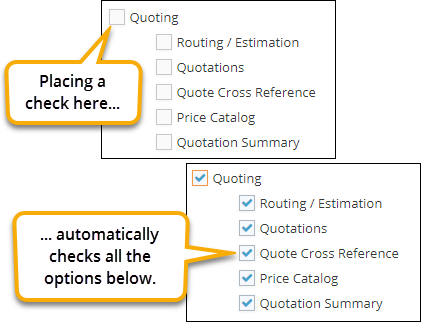
- Placing or removing a check from a top level checkbox affects the associated sub checkboxes as well.
- Removing the check from a top level checkbox removes the checks from all associated checked sub checkboxes as well.
- Placing a check in a top level checkbox adds a check in all associated blank checkboxes as well.
- Users can see all information on any record they can access.
- Users that have read/write privileges (based on the View Only User checkbox) can also create, edit, and delete records they can access.
Saving Securities
When saving securities, there are two steps that must be completed in order to have the securities take affect:
- Click OK to exit the Security Settings with your selections in tact.
- Click Save to exit the user record and save the settings.