System
Configuring JobBOSS2 User Email Settings for On-Premise for GoDaddy OAuth2
GoDaddy uses Microsoft® to authenticate for email. Microsoft no longer supports Basic Authentication for email services. Instead, Modern Authentication (OAuth2) is suggested for Microsoft Exchange Server and Microsoft 365™.
On-premise customers must make changes in their Azure™ active directory and on their local server in order to initialize OAuth2 for GoDaddy for use in JobBOSS2.
This procedure contains the three sections necessary for setting up GoDaddy and JobBOSS2 to use OAuth2 authentication:
- Setting up in Azure AD
- Setting up on local server
- Setting up in JobBOSS2
- Users must have admin access to all three platforms to set up email services for OAuth2 in JobBOSS2.
Follow the steps below to start setting up JobBOSS2 for OAuth2 authentication:
- Go to the Azure Active Directory admin center.
- In the left-side menu, go to Overview > App registrations.
- Click Owned Applications and then + New registration. The Register an application window opens.
- Enter a name for the new application in the Name field.
- Select the following Supported account type:
Accounts in this organizational directory only (Any Azure AD directory – Multitenant) and personal Microsoft accounts (e.g. Skype, Xbox)
- Click the Register button.
- The Application (client) ID is created. Save the Application (client) ID for future reference.
- Under Manage > Authentication, add any applicable platforms and redirect URIs and save the values.
- Under Manage > Certificates & secrets, click +New Client secret and create a client secret.
- Save the Value. It will be added later in the App.config file.
- Go to Manage > API permissions and click + Add a permission.
- Select Delegated permissions.
- Open OpenId permissions and select the options for email, offline_access, openid and profile.
- Expand Mail, select Mail.Send and then click the Add permissions button. The API permissions window opens. The application is ready to use in testing environments.
- Optional: To use in production environments, Microsoft recommends Publisher verification. Go to Manage > Branding & properties > Publisher verification. Click here to learn more about publisher verification. Note: If this step is skipped, when you sign in with Microsoft, the app appears as "unverified."
- Retrieve the saved ClientID and ClientSecret values to use in the next section.
Before initializing for OAUTH2, the option for GoDaddy does not appear in the Email section of User Maintenance (under Systems on the Settings tab):

Follow the steps below to set up JobBOSS2 On-Premises for OAuth2 authentication:
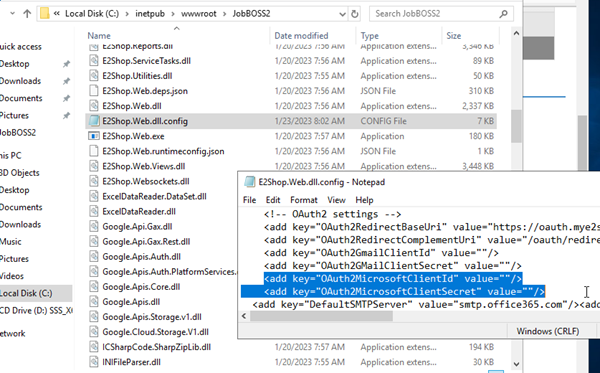
- On the Local Disk (C:), go to inetpub > wwwroot > JobBoss2.
- Search for the file named E2Shop.Web.dll.config and click on the name.
- Right click on the file name and open in a text editor.
- To configure the credentials for OAuth2 in GoDaddy, reset the ClientID and ClientSecret values in the text editor:
- Save the changes in the text file and close.
- Restart the system to make changes.
- Log back into JobBOSS2 and go to Settings > System > User Maintenance
- After changes are applied, the Microsoft GoDaddy option appears in the Email Type dropdown in the Outgoing Email section of User Maintenance.
- Go to the next section to begin setting up Outgoing Email for users.
- After initializing JobBOSS2, log in and go to Settings > System > User Maintenance.
- Select the user profile to use Microsoft 365 and click the Edit button.
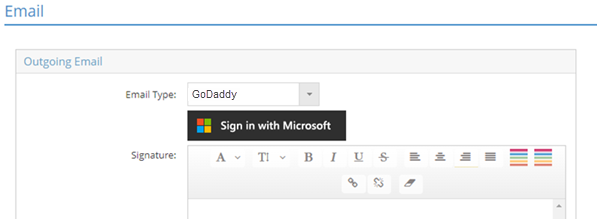
- In the Outgoing Email module, click the dropdown for Email Type and select GoDaddy.
- Click the Sign in with Microsoft button:
- The GoDaddy page with the Microsoft login module opens. Enter the email and password for the Microsoft email account.
- Click Yes to allow access permission to the account.
- Click the Save button in User Maintenance.